0

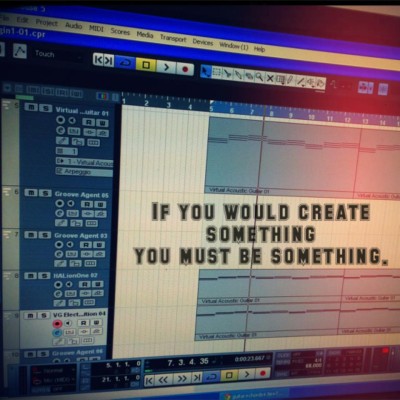
Song: Dream Girls Friend

Stage 1: Skeleton

  1. So I wrote the song last night before I sleep.
  2. Now I use piano to play out a rough skeleton of the song.
  3. Then I record the chords.
  4. Then I added v guitar and groove beats.
  5. Now I finished a skeleton.
  6. Now to get the right key for the girls, I used gong tong peng you as range reference, first I get lowest and highest notes, and try to set the whole song in the same range.
  7. -2 = B key
  8. Decided to arrange a bit but starting from the end of the song!

Stage 2: Reverse arrangement

  1. Added bass
  2. then added kontakt guitar, coldplayish, need to use pedal
  3. Bounce to rough_stage2_bounce
  4. Unload instruments and save to rough_stage2_bounce_unloaded


Stage 3: Vocals


Stage 4: Mixing


Stage 5: new lyrics and recording.

facebooktwittergoogle plus

0

第一課:摸索

昨天終于安裝了一些音樂軟体,好興奮。。


現在卻踫到釘子,要怎麽把藍色那塊移動呢?找傑瑞老師時間拉~


想法,問題,都寫在這裡,讓我,老師和大家都能知道在想什麽~


記得文章都要在右邊選擇 ‘Jenny 學習路程’ 的分類阿!


July. 23 -2013

好的~~! 今天終於把Virtual Acoustic Guitar、HALionOne、Groove Agent、VG Electric Edition的音色和節奏都調好了!

但總覺得兩個小節或幾個小節過後,應該要來點不一樣的東西…

比如加強鼓聲的重拍,或是吉他的節奏與音色,但是只要一調整,整個音軌也跟著變…


原始一點的做法,就是再開一軌同樣的樂器 (再開一把吉他,選擇不一樣的彈法和音色),但是晚點才開始給他下 MIDI。 至於鼓呢,比較麻煩,下一堂課再教你。 – jeric


這次選用的合弦應該要找一首歌的和絃當範本,但我摸了兩首歌都覺得怪,抓不到和絃

於是我用了”卡農”的和絃作為我”處女作”的”底妝”~

只是這組合弦如果沒有層次的編排,聽久了會很疲乏…

對…我現在已經在疲乏狀態….. ( z~Z~z~Z~ )

按下PAUSE之後,開始玩起FB…

照現在這樣的進度…. 20天能完成一首歌嗎我?!

天啊~~~做音樂真的不簡單啊~~~~~~~~ =0=”


946280_4763004767834_849450076_n


facebooktwittergoogle plus

0

Song: LOL ERock

focus:

  • vocal
  • melody
  • groovy,sexy,dance,shiok!
  • lyrics
  • style
  • music


vocal editing priorities:

  • feeling
  • diction
  • style/skill (end of slice pick)
  • volume (adjust – sounds soothing to ear, mix well into music)
  • vari length pitch (crossfade sources, bounce and do)


Build up Rising synth sweep (pitch mod) intro:

  • Omnisphere Default
  • Change Soundsource to Air Raid
  • Adjust Bend Up values, and play with Pitch bend
  • Hit the note where the sweep starts
  • Draw the Pitch Bend Modulation line in Midi Editor.
  • Adjust note and Bend Up Values to get perfect build up rise.


Stage 1:

  1. Gathering build up sweeps, noises, noise hits
  2. the LFO up sweep white noise (david guettaish)  can be found as a finished product in Vandalism Shocking Build up pack in localmusicdata/collectedsamples/ (I created my own in Candlelight, so we can use this to save time, or re-use the custom one in Candlelight
  3. Discovered trick to make any sample RISE – use the omni ‘Roadrunner of the Future’ and use custom sample to rise
  4. bigfishaudio dubstep killer > kit 05 >last note  is a nice rising future car sound
  5. bigfishaudio dubstep killer > kit 08 > A#2  is a nice rising sweep
  6. bigfishaudio dubstep killer kits, have a few nice SUB SWEEP to use.
  7. Mod wheel a SINE (say tr arp 2600, with bend 2 – 20) , in Omni, can also have a buildup risiing sub sweep.
  8. This project stage is named is ‘rough’
  9. Time to bounce these beats and effects in WAV and save project as ‘rough_bounce’
  10. Finally, unload the instruments to get a ‘rough_bounce_unloaded’ project.


Stage 2:

  1. Added melodies and chorus high
  2. Massive: To adjust Pitch bend range, head to Synth > OSC tab in the middle, and adjust
    Up and Down.
  3. When saving a custom new patch, save to Cubase project document AND Storeroom
    Musicdata > Others > Massive_Jeric_Sounds
  4. To make the whip / clap sound in Chorus, use a
    Nexus Clap (DR Claps 9)and and and a Reverb and increase Mix. (discovered later, oct 7th, 2013, under Nexus > Percussions 1 > there is a nice whip)
  5. Discovered a nice dubstep scratch sound at
    Nexus > XP Dance Vol 2. > LD HS Velo Pitchlead
  6. This project stage is named ‘rough_stage2’
  7. Time to bounce these ideas and save as ‘rough_stage2_bounce’
  8. Finally, unload instruments, but I found a chorus stack and bounced it before saving ‘rough_stage2_bounce’


Stage 3:

  1. Adjusted some parts and sound, decided the melody and idea for 3rd part and ending.
  2. Added FX channel, reverb, music needs to be smoother, prettier, for the ‘market’


Stage 4:

  1. Vocoder effect, requires a source wave, could be vocals. So I apply IL Vocodec on my vocal, and added a MIDI track and select the vocal+IL Vocodec track as the OUTPUT for the MIDI track.
  2. Out to find all the nice LOL sounds for this track that is suitable and keep the electro rock mood to it.
  3. Bounce to rough_stage4_bounce
  4. Unload to rough_stage4_unloaded


Stage 5:

  1. Added Bass
  2. Upgraded beats a little
  3. Bounce to rough_stage5_bounce
  4. Unload to rough_stage5_bounce_unloaded


Stage 6:

  1. Recorded vocals.. should it sound good, but what attitude?
  2. Got a little lost, so I’m going to look at previous blogs on my vocals. Found write up on 我想了很久, and thus.. I got my priorities.
  3. Designed a crazy rap – now to get the sound, I get my perfect rap sound, then I make 5 doubles.
  4. And then I experiment getting low and high version and keeping the source, will play and mix later.

Stage 7:

  1. Perfect the main singing vocals.
  2. When adding Delay > StereoDelay to a mono track vocal, only the left part works. To do stereo,need to send the vocal to a newly created FX track.


Stage 8:

  1. Perfect and create a rap sound. Keep cutting for best expression.
  2. Rap sound = 1 low , 1 high , 1 double exact stack, 1 robot stack
  3. Adjust each volume solo, to stack nicely with main rap sound.
  4. Then listen and mute on and off at random times so it sounds like 1 vocal.
  5. do mute read write for ‘High’ then ‘Low’ then ‘Robot’ and ‘double stack’.
  6. Jeric’s private vocal sound.


Stage 9:

  1. Mixing!!! Upgrade some of the core sounds of the arrangement.
  2. Left and rights.
  3. Snare boosts?
    -blend with sample/s
    -boost/cut frequencies
    -compression
    -transient designer
    -better drum/head/tuning/player
  4. To add punch try using SPL compressor or look for SPL Attacker.


Stage 10: (modification, adding DOUBLE KILL)

  1. Re-record new rap lyrics
  2. Edited chorus rift (see below)


Stage 2 edit:

Went back to stage 2 (rough_stage2_bounce), to edit chorus disco lead. Chorus rift had a stack in stage 3, but i skipped it and edited in stage10.

facebooktwittergoogle plus

0

VST: FX Teleport

If there are problems seeing the server, sometimes you need to restart FX Teleport server on the remote machine. And then also click on the ‘Options/Tools’ icon. use ‘ping <ip> -t’ on both computers to estabish a connection.


If it’s a Parallels Machine, make sure it has its own IP address by using a Bridged network instead of Shared.


Give it a static IP.

facebooktwittergoogle plus

0

Song: 我想了很久

focus:

  • vocal
  • melody
  • touching
  • lyrics
  • style
  • music


vocal editing priorities:

  • feeling
  • diction
  • style/skill (end of slice pick)
  • volume (adjust – sounds soothing to ear, mix well into music)
  • vari length pitch (crossfade sources, bounce and do)


With the above in mind, let’s do this piece.


Let’s try to do this one really fast.

Started 1:29pm 28th May 2013.

  1. Get song tempo. Should be 61.
  2. Starting song at bar 10, cos on average that should be a good enough for space intro.
  3. After a 5 minutes of thinking, song should be: verse intro, verse, chorus, solo, chorus, verse ending. And sort of free play at certain parts.
  4. Finish 1st verse and chorus piano skeleton.
  5. Decided to move the whole chunk to bar 15 instead.. imagined a longer intro.
  6. Added violin and cello, to solo the intro, don’t really like it.
  7. Added guitar strum, nice. Added guitar pluck in verse, nice too.

Ok I totally missed my mark, rested nearly 2 weeks of meetings.

So I continued and and finally reached stage 2.

stage 2:

  1. Added dramatic Hit, explosive boom, and Snare which is basically filtered white noise.
  2. And then cinematic sounds for hihat replacements.
  3. Finally some standard drum sounds from Groove Agent!
  4. That’s it a short stage 2 so I can move onto the dramatic SOLO!


stage 3:

  1. The solo! Very beautiful mix of orchestra, electro, and Addictive Drums, custom drums, saved as preset both in Song Folder, and in MusicData on Storeroom. Always save in 2 places!


Oh no, it’s 6th July! 1 month.

Anyway, discovered a new sound in Omnisphere – Rumble Impact Vertigo – by turning on just Ancients, it can sound like spaceship landing.

I’m currently at Stage 7, adding pads and fx into the track. Headed to Omni, and selected Genre > Ambient. Then browsed through EACH instrument and run through chordworks, and see which fx fits.


another nice fx: time travel

Life on the Barrier Reef – use only Chaotic Glock


omni – ode to mr newman arp – ebowed piano pure only – sounds very interesting when tempo changes.


since this is a fully self made arrangement, during mixing, just deal with volumes with references, not sound by sound or instrument by instrument, general volumes.

facebooktwittergoogle plus

0

Song: Candlelight

Started by getting song tempo: 126

Next is the beat from Stylus 808


sweep:

Open a Prologue synth. Turn the Oscillators all down. Turn the noise knob up, experiment. Set the filter to High pass 24dB HP, but you can experiment with this too. Finally, play around with the envelops.

Program your sweep and play with automating the drive, emphasis and ring mod.


understanding: apparently you cannot do pitch shift on noise.

need to run Shift effect on the output.

But the key idea is adjusting Drive and Shift instead – so auomate these 2 is most essential for an Ascending Sweep.

Automating the EQ from low bass to High frequency can increase the effect.

and of course the volume.


trance gate: SPC gater pro

manually adjusted mix,  shape and positions.


Another one is : omnisphere, wheel noise sweeper for the standard one


things to checkout omnisphere:

club noise sweep 3

Bandpass Noise Hit(all the white noise hits)


stylus:

Reset crazy stylus, select stylus > Mixer > Kit , then select ‘Multi’ after one second.

apparently, stylus keeps forgetting or going crazy when used with jBridge, so when u have finished a Multi set up, save the whole Multi in /stylus_multis and load it when it goes crazy.

Not a good idea to add EFFECTs to different stylus channel, will cause MIDI lag/delay later.


take some time to go through cool sounds on omnisphere:

Reverse forward

backward thinking

backwards masking


stage1:

skeleton and percussion and fills and ideas


And now I’m bouncing the materials from yesterday, stage 1 – 8th May 2013 – 8:33pm. This time I chose to bounce with all the EQ, Inserts and Automation, if I need source I’ll do it again. Reason being it’s the exact sounds I need and I dont think I would work on them again.

Finally done bouncing at 10:08pm. Also saved a copy of rough_stage2_instruments_loaded , as some stuffs need to look a automation to understand how the sound is made.

rough2_bounce would not have the instruments loaded.


stage 2: pads bass1

Decided to add bass and also make some edits to the WAVs so I can hear how to piece sounds. Sounding great at this point. Added quite a few reverse to the Bombs

Started looking for good pads from Omni at 3:36am from the group All > Evolving Motion to add texture to pads.

– Lap Steel Granular Bed – to grab some parts later – so bouncing. 4:12am SLEEP.

restarted at 4:32pm, intro needs some textures,so getting a few pads from omni > All > complex motion


Grabbed the ‘Sun Spot’ sound by going to Drones in Omni, and turning off Layers.

I think we’re almost done with all the sounds! Time to get that ‘Fusion Piano’ rift upgraded a little –  – Omni (ARP + Rhythm) added 2 arps to it.


stage3: mix. pads in bridge

I was pretty straight forward and easy .. but I think the beginning of bridge needs a bright / churchy /organish pad. need to rest a bit .. ears tired.

Added pads and key leads to Bridge, and finally mixing track by track!

Skeleton completed!!!

Things in mind to add.. (bass ending, better clearer bombs, lfotool Doppler wob)

http://news.beatport.com/blog/2013/03/28/10-must-try-vst-plug-ins-for-producers/


stage4: vocal recording/ sourcing

so I finished the lyrics today in 20 minutes. Now I’m gonna start recording more sources into the project at 4:34pm. Why not bounce all first? I might want to change some stuffs.. and my computer still has resources/memory to handle it.

Took 30 minutes for the recording, time to edit and perfect them vocals.

Decided to play with the ‘Send’ effects. To bounce the ‘Send’ effected vocals only, need to select the ‘Pre-fader’ icon so it turns orange, then when you solo the vocal, and slide down the volume, you will only hear the ‘pre-faded’ effect WITHOUT the vocals.


Mixing down the main vocals (with effects) and also effects separately. Effects should behave like a nice warm pad, so .. use your ears.


stage5: final mix

Here I started adjusting where I wanna hear the delayed vocals, reversed some vocals as fills.

Finished! But if I have to pick.. I’d like to change the bomb, and add bass glide down, and song ending slightly~

Listening on headphones, to add some pan effects in certain parts.


stage 6:

So someone spotted “沒“ sounds like “也“ and therefore fixed. And yes, upgraded the bomb, and added the bass glide down. And the breakdown ending is now cleaner. version 0.2


facebooktwittergoogle plus

6

Custom Player

This theme includes an in-built and ready to use jPlayer plugin to display your playlists.

You can create an unlimited number of playlist, with self hosted songs, with a custom logo and options for each.

For each song, you can set “buy” links to itunes, amazon or your own store; You can upload an artwork for each track and even allow free download for chosen songs. Awesome, right?

And there is more!  You can share your hosted custom player’s url or embed code by simply clicking on the “share” icon on the top right of the player.

Any playlist can be embed anywhere!!! exemple here

More about the jPlayer

facebooktwittergoogle plus